
Part numbers required for full retrofit to make the '90-'92 have
the same braking system up front as '93-'96: (yes, even steel calipers)
| Backing Plate:
|
41160-37P01
41150-37P01 |
| Air Guide: | 41183-37P01
41182-37P01 |
| Brackets: | 41184-37P00 (2) |
| Fender Well: | 63841-45P10
63840-45P01 |
| Hub Seal: | 40232-30R11 (2) |
| Snap Ring: | 40214-33P00 (2) |
| Hub Bearing: | 40210-33P07 (2) |
| Hub Assembly: | 40202-33P01 (2) |
| Steel Caliper: | 41001-37P00
41011-37P00 |
Parts I used:
brackets & the air guides, then used 5/16" hardware for fastening.
Note: the fender wells are the 'venturi panels' under the front of the car. I opted not to purchase these, just use the air guides.
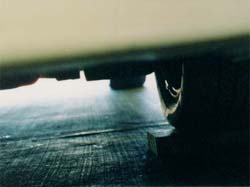
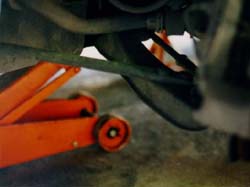
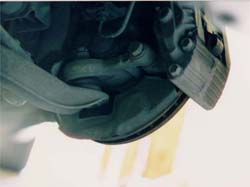
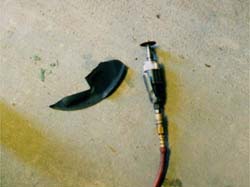
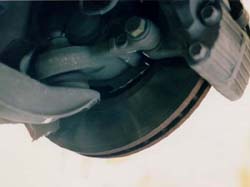
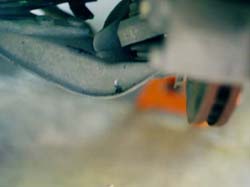
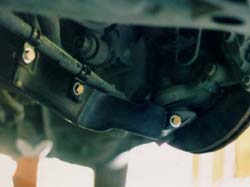
The air guides attach to the front control arm & funnel air into the rotor/caliper area for cooling. (1.) Loosen the lug nuts on both front wheels. After properly lifting the Z using a jack & jack stands (you will have to be under the car a little bit). Remove the front wheels. Turn the steering wheel the appropriate direction to gain access to the back side of the rotor shielding (backing plate 2.). Using a die grinder with a cutting wheel on it, remove the lower portion of the rotor shield. The metal removed should look like this. (3.) Take extreme caution not to nick the rotor under the shield. A 1.5" cutting wheel is required. After the shield is cut, you should end up with the whole bottom of the rotor exposed. (4.) An extra hole is required for fastening the plastic air guide to the end of the lower control arm. (5.) When the clamps (brackets) are tight, they only hold the guide to the front control arm, they don't get tight. The deflector counts on this new hole to keep it in place in case it hits road debris. The clamps go around the front control arm with the white dot toward the engine to aid in installation, the holes for the bolt are cut differently for each side. Tighten the bolts down on both clamps, then bolt the deflector to the lower control arm using the newly drilled hole. (6.) Put the wheels back on, lower the front end & tighten the lugs. You can see that the deflector is fully exposed (7.)to air traveling under the car. The 'venturi panels' would direct more air to the deflectors & install as part of the plastic shielding under the intercoolers.
© Twin Turbo Zs of Dallas - All Rights Reserved 1997
 2.
2. 3.
3. 4.
4. 5.
5. 6.
6. 7.
7.