
This installation of PBR Metal Master front pads P.N.: D1170M was done on my '95 TT
Timing:
Anytime the pads are down to the wear indicators.
Special Tools:
4+" C-clamp
Part Numbers:

All links for OEM parts go to CourtesyParts.com for on-line parts ordering.
front hardware (shim) kit: (recommended)
41080-40P26 TT/NA 2/89-2/91
41080-40P27 TT/NA 2/91+
Note: If not using a new shim kit, clean up the old shims and use some CRC 'Disc Brake Quiet'. It's a small red bottle of PCB type grease as a replacement.
41060-37P91 front brake pads TT/NA all years
44080-43P25 rear hardware (shim) kit TT/NA all years (recommended)
44060-04U86 rear brake pads, TT/NA all years
Procedure:
1. Remove the wheels: Break loose all lug nuts for wheels involved. Get the car in the air, enough to get the wheels off the ground. Make sure all jack stands are properly placed, & all safety measures are taken. Remove lug nuts & wheels for access to calipers.
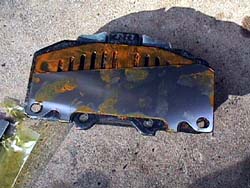
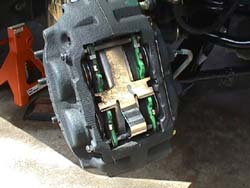
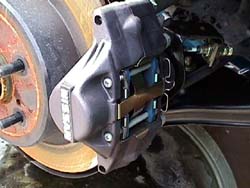
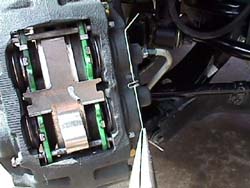
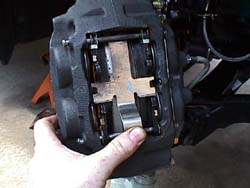
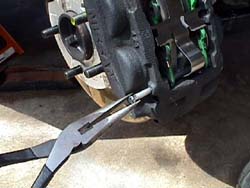
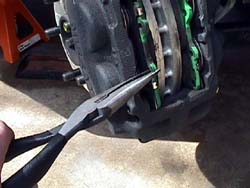
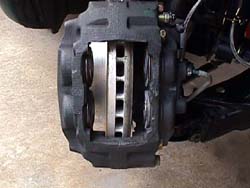
2. Remove the old pads: The front & rear calipers are basically the same, except the rears are 2 piston & the front are 4 piston for more stopping power up front (1. & 2.). To remove the pads, pull out the wire clip holding the retaining pins in place (3.). Cover the large X shim spring with one hand while removing the retaining pins with the other (4. & 5.). Then pull the pads out through the top of the caliper (6.).
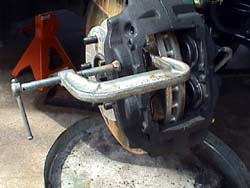
3. Make clearance for the new pads: Loosen the brake master cylinder lid, then take a C-clamp (7.) & SLOWLY squeeze the pistons back into the calipers. This leaves room for the new pads to fit in-between the piston & rotor (8.).
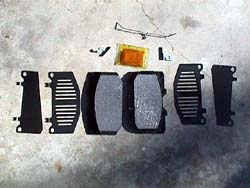
3. Sort out new parts: Proper pad replacement would require purchase of a new pad shim kit to go with the brake pads (kit contains everything to do two calipers worth). This keeps the pads in proper alignment & cures about 80% of the clicking, popping & creaking from the front brakes. The main reason for purchase is the PBC grease that comes with the kit. Very nasty stuff to work with, but seems to be the key to reducing noise in the braking department. Separate the kit out with 2 vented shims per side, 2 opposite solid or solid w/ angled shims ('91 and earlier have a full shim) per side, 2 opposite angled small clips, one wire clip & 1 packet of PBC grease along with 1 regular pad & 1 wear indicator pad per caliper (9.).
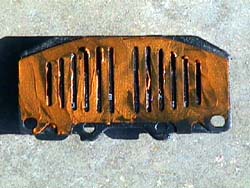
4. Prep the new pads: For each pad, coat both sides of the vented shim with the PBC grease, then apply it to the (metal) backside of the pad, the tabs on top hang over the top of the pad to hold it in place (10.). Put the solid angled shim on the back of this with tabs going over the top of the other tabs from the vented shim. The proper angled shim ('91+) will have the wider part toward the bottom for the pad when placed in the caliper. Coat the backside of the solid angled shim (11.) with PBC grease. Clip on one shim retaining clip to the pad, with the hole side going on the pad side & the long part running across the top edge of the pad (the smaller side) as a shim between the pad and the caliper top or bottom. This stops the forward/backward clunks noises from the brakes.
5. Install the new pads: Reassemble Reverse removal steps to reassemble the caliper/pad assembly. Make sure to put the wear indicator pads on the inside, as it is easy to see the regular outside pads to check for wear. Also, be sure to pump the brakes before needing them (while the car is still on jackstands) to get the fluid back into the calipers.
6. Install the wheels: Finger tighten the lugs. Lower the car back to the ground. Torque lug nuts to 78ft-lbs using a criss-cross (skip 1) pattern. Do this with a proper torque wrench. Improper torque values are probably the leading cause of rotor warpage. NEVER let the tire shops, etc. put the wheels back on with an air wrench. Make them do it by hand. I personally won't even let them remove the lugs with the air wrench, everything is done by hand.
REVISED 10-15-2003
Go to Stainless Steel Brake Line Install & Brake Bleeding Procedure page
© Twin Turbo Zs of
Dallas - All Rights Reserved 2003
2.
3.
4.
5.
6.
7.
8.
9.
10.
11.