
Timing:
Anytime the wheels are off.
Special Tools:
Torque wrench
Installation:
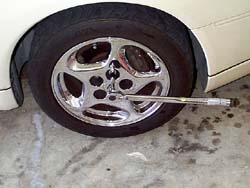
1. Break loose all of the lug nuts while the car is on the ground. The stock lugs are 21 mm. (1.)
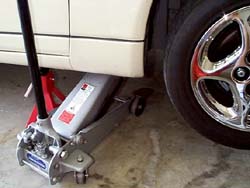
2. This is the safety step. When jacking up the front, put a brick behind the opposite rear wheel as a precaution to keep the car from moving (always have the parking brake on and the car in gear). (2.) Also put a jack stand under the car for safety. After the wheel is in the air, finish removing the lugs and wheel.
3. Inspect the brakes for any thing out of the ordinary. This is also a great opportunity to replace the pads if they need it. I recommend Metal Master pads. They really help your stopping power and are very fade resistant. (3.)
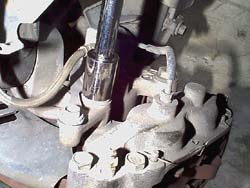
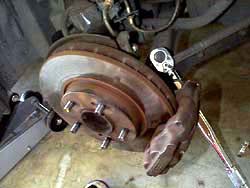
4. There are two 21 mm or 19 mm bolts on the back side of the calipers that attach the brake calipers to the suspension. These need to be removed so we can get the caliper off. The rotors are 'floating', meaning there is nothing besides the brake caliper and the pressure between the wheel and wheel bearings keeping them in place. Use the torque wrench to break the bolts loose. (4.)
5. When the bolts are removed, work the caliper off of the rotor. Be careful not to twist and break the brake fluid line. It is also a good idea to support the caliper after it is off the rotor to take the pressure off of the brake line. (5.) I am actually using steel braided brake lines. They help a lot with improving the pedal feel and applying the braking pressure to the rotors instead of expanding rubber brake lines.
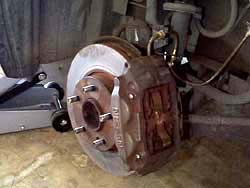
6. Once the caliper is off, just pull off the old rotor and put the new one on. Now reverse the process. Getting the brake caliper back over the new rotor and getting the caliper bolts started is the hardest part of the process.
7. Using the torque wrench, torque the caliper bolts to 72-87 ftlbs. (6.)
8. Put the wheel back on, tighten the lugs by hand, and lower the car back down. Be sure and torque the lugs to 75 - 85 lb/ft. (7.)
That is all it takes. Just repeat the process for the other side. Put all the tools away and you are done! If you are putting on cross-drilled rotors, they usually have a bed-in process and break in period to follow. Just refer to the documentation that came with them.
Russell "Silky Smooth" Siebert
Removing the rear rotors requires a little additional effort. The emergency brake doesn't use the caliper like other cars do, it has it's own set of conventional brake shoes inside the rotor 'hat'. To get the rotor off the axle, make sure the emergency brake is released. Tap the rotor with a plastic mallet to get it to release from the hub. If that doesn't work, there are two threaded holes in the hat area to screw in pulley puller studs. Either attach a puller there, or get two bolts that fit the holes, twist the rotor where the bolts can be threaded all the way through without hitting the brake components inside & make contact with the backing plate. Just tighten them up until the rotor comes loose.
Updated 11-15-2000
Go to Stainless Steel Brake Line Install & Brake Bleeding Procedure page
© Twin Turbo Zs of Dallas - All Rights Reserved 1998-2000
2.
3.

4.
5.
6.
7.